excited to share all the stories from our house and my creative endeavors! I hope this blog will inspire you to find that Creative Diva that is in all of us!

Wednesday, October 19, 2011

a little Mischief....

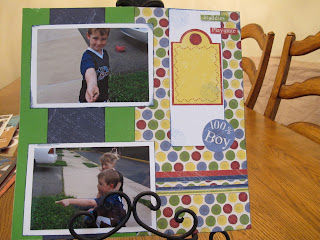
The Bohnart Family has been up to a bit of Mischief lately and I dived into the new paper pack by Close to My Heart to honor our Mischief.  :-)  What I love about this paper pack is its versatility!  It is a great fall paper pack- from your Spooky Halloween events to your family focused fall celebrations- this paper will work beautifully!

I have been scrapping a bit each day- trying to do a layout everyday or at least 3 a week.  So far I am keeping in my rythym.  I found I had a creative block for awhile and I think the biggest thing that was keeping me from Scrapping was I was OVER THINKING!  I started to question my own abilities and artwork- sad but true.  I finally let it all go and just started creating.  It is meaningful to me and having my children come home and look at the pages and remember these moments really helped me focus on my true WHY!

It seems lately that life has been whizzing bye.  Moving as much as we do often times helps me to stop and reflect on our journey and keep life in perspective as well as make me crazy setting up our home over and over again!  LOL!  I scrap to remember our journey and all the special moments and adventures!

So here is my take on the Paper Pack Mishief....


And here are a couple of other layouts I have done this week-


Life has been on a roll here with Patrick doing Fall Baseball and Ireland taking piano and horseback riding lessons.  It is so fun to watch them become more and more apart of their new community.  This is Patrick's first season of kid pitch and we are so proud of his growth with the big guys!


Then there is Ireland....fitting right in and making a name for herself!  I tell you the 1st week I volunteered at the school I was so blown away by all the staff that already knew my daughter!  Her new friends even helped her become a part of the safety patrols at school- which after the ceremony Josh and I found out is a big exclusive deal at this school!  CRAZY!  !  They had a cute slide show at the Safety Patrol Ceremony and it was fun to see Ireland up on the screen!  Pride beams from us and thanks for letting me brag a bit about my fantastic kiddos and how special they are


Serious Safety Patrol Cuteness!!!


Here is hoping that October is bringing you lots of fun and Mischief!

~Jennifer  :-)

Friday, September 23, 2011

Fun Friday Crafty Project= DIY Time!

So many of you know we recently moved and with that comes organizing and finding homes for everything!  Okay so I think I have that part pretty much under control- just wish the little people in my house would keep with the system I created!  HA!  


Next comes the FUN part- DECORATING!!!!!!  We have been having fun changing things in the house.  I have to say I am pretty lucky that my Big Guy is so willing to do some of the work I envision because without his skills I would be calling a Handy Man or the men from Lowes or Home Depot to come do it!  So my Big Guy has changed out the lightining in the master bathroom, the entry hall, the dinning room, and installed 3 ceiling fans so far and a light for my office or I should say our joint custody office.  :-)  While he has been doing that on the weekends I have had fun hanging pictures, arranging furniture and putting my spin on the house.


   So where does the DIY part come from....well we had 2 chairs my Mother in Law gave us 4 years ago and they were in need of some tlc- wish I had a before picture.  The paint was chipping off and rust was starting to form.  So I sanded them down, then put a rust primer on them, and then next layered on the new Almond color.  I think they turned out pretty good and look nice on our new enclosed patio.  :-)


Once in awhile my hubby gets involved in the decorating which can be challenging sometimes!  HA!  No seriously he has a good eye but when he decides to go the Sport Route leads me a bit crazy.  He has this Packer Thermoter that we got when we went to Lambeau Filed last summer and he has been waiting to hang it somewhere......yep he found a home for it!  We needed new cushions for our patio set as the other ones were pretty worn out after 6+years.  So I needed to find something that could coordinate with the proud Green and Gold but take it up a level of sophistication if you get my drift!  And thankfully I found these pillows- LOVE THEM!  Then I found some simply Khaki seat cushions and we are good!


     Now onto my new DIY project that will begin this weekend! 


 Our Kitchen table!  Okay when you are military and move as much as we do pieces of furniture need to be transitional.  This was our Kitchen table back in Navarre, Fl four years ago but when moved into our townhouse we did not have room for this and our dinning room set.  So this table became a night stand in our bedroom.  Yep- how crazy is that?!?  Our bedroom was that big that the table could be a nightstand.  The 4 chairs that went with it I had no need for and they were in pretty bad shape so we donated them.  Fast forward to here....we have room for the table but I needed chairs 


and I want to paint the table black to go with the house.  I found 4 chairs at Home Goods- love that store.  They have a weathered gray finish on them and I think they will look really sharp with the table when it is black.  So that is my new DIY project- to paint my table black.  And the big Guy will be putting in a new lighting fixture too this weekend.  


So stay tuned.....I am excited for the results!!!!


Happy Fun Crafty Friday!


~Jennifer

Monday, September 19, 2011

Birthday Gift for Fun Friday Crafty Project!

Yep it is Monday- OOPS!  So I have been working on making my Mom cards for her Birthday present this year.  For Mother's Day she wanted cards made by me and now for her Birthday that is what she requested as well.  So over the summer I have had fun carving out time to create some cards for her and then it dawned on me.....

She needs a cute Card Box to put all of these in!!!!  So here is a fun project I love and makes a great gift and even better when it is stuffed full of cards!


Here is what you need:

* My Acrylix Organzier
*A Paper Pack of Your Choice with coordinating Cardstock- I used the retired Silhouette Creative Basics Paper(oldie but goodie!)
*Coordinating Ribbon
*For Every Occassion Stamp Set(one of my ABSOLUTE FAVORITE stamp sets!!!!)
*Alphalicious Cricut Cartridge for the Letters.


Dimensions for the Box:

Need 2 4x12 pieces to wrap around the box.  These two pieces meet in the back of the box and wrap to the front.  You will have a gap in the front but the next pieces will cover that and you will not even know!

1 4x6 piece of carstock- mine was black
1 3 1/2 x 5 1/2 piece of cardstock- mine was bamboo
take a piece of ribbon and wrap around these pieces.

Your cut out letters will fit on this above piece- arrange them to your liking.  I used 2" letters to create my title.

Inside dividers- 6 6x6 cardstock pieces.  I used a true fit folio to trace top of the file folders to make the outline.


Looking forward to mailing this box full of cards to my Mom this week!  Wish I could give it to her in person but Colorado is a bit far from FL!  :-(

Wishing you success with a fun crafty project whatever day you choose to create one!

Creatively Yours,
Jennifer  :-)

Friday, September 9, 2011

Guest Post! for Fun Friday Crafty Project

Sorry I missed last Friday- hubby had the day off and that always gets me out of sink!  Thankfully we knocked out some house projects around the new Casa and made a list of what I still would like to "reasonably" conquer.  :-)

Fast forward to this week where one kiddo got diagnosed with Strep Throat on Tuesday and then the other one came down with it yesterday.  Not much crafting taking place this week as I have been running back and forth from clinics, pharmacies, etc...  As well as becoming the queen of Lysol.  I am just hoping this is not a sign of my year to come with the kids at a new school and new environment.

My fabulous friend and dowline Kris Brown made me the most original and CUTE gift before I left Virginia! You can find Kris here and if you live in the NOVA area you should attend her fun monthly workshops!  I miss Kris' monthly inspirations at club!

 I adore this and I am so happy to have found the PERFECT spot for this in our new Casa!  She told me that she loves to make these for wedding gifts- what a great idea!  I think they are the perfect gift and adds such a classy touch.  I was so surprised when she broke down how easy it is to recreate!

You say you like it too???  Okay so here is what you need:

a black frame(size of your choosing).  Your are going to take all the mattes and paper out and just leave the glass.

a drill(going to have to drill 2 holes into the top of the frame to thread your ribbon through)

Ribbon- fun ribbon to coordinate with your project.  For this frame Kris used our Dark Chocolate Striped Grosgrain Ribbon.

Vinyl- so 12x12 or 12x24 vinyl sheets to use in your Cricut to cut your letters out.  I would love to hear from my readers of the places they shop at to find the best prices and selection of vinyl to use with their Criuts!

And really that is all.  You pick your font or fonts you want to use with your Cricut, size of the lettering and then just put together!

I love the possibilities of this and I am so grateful to Kris for such a thoughtful handmade gift and one that gets my crafty energy peaked!

Here is hoping all are healthy in your house and that you have some time for a Fun Friday Crafty Project!

Creatively Yours,
Jennifer :-)

Wednesday, August 31, 2011

C'est Magnifique!

I am having so much fun catching up on my scrapbooks minus the other day when I had to spend over an hour figuring out that I had scrapbooked pictures in the wrong year.  OOPS.  No major biggy other than a date wrong on a page and then sent me into a panic to look through the pages and make sure I had not made other mistakes!  So I am using this time to get caught up!  I feel like I have been working on 2006 and 2007 FOREVER!!!  This moving stuff really interfers sometimes!  :-)


   Let me tell you about my crazy, easy process of scrapbooking CTMH style- LOVE IT!  So this layout just started out with me looking at 7 photos and thinking hmmm how will I put this together.  FIRST step- the CTMH layout books(LOVE THEM ALL- you've got to pick one or all of them up, click here to check them out on my online shopping page)!  I took out the Magic book- looking through to see what layout with 7 pictures spoke to me.  VOILA!  It was the Shuffled Deck Layout on page 42.  Second Step- paper....hmmm...what to use???  The turqoise in the pool pictures really spoke to me and I wanted to capture that and the fun polka dot turqoise paper in the Magnifique collection really caught my eye!  So then I start pulling out paper and layering to see what combination looks the best to me.  Thrid- I cut the pieces out according to the directions and then glued the puzzle together and there is the layout!  


Of course if you know me I cannot leave paper ALONE!  I have got to distress it! 
 So out came the Pacifica ink and I distressed all the pieces- yep all of them!  Love that Distress to Paper Technique- simply swipe the edges of the paper in your ink pad!  There is no right or wrong!  Okay then I had to scissor distress some of the pics to give them interest.  Thought that would really help draw your eye to the 4 2x2 pictures layed in a row- love this techqnique too!  


 And if you notice I even had my Cricut Chirping today!  Boy is it ever fun to have your titles cut out!  I simply sanded each individual letter too! And I found Liquid Glass to be a great adhesive for these skinny letters.   I used the Jasmine Cartridge.  :-)


And I am so happy with my layout and of course I love remembering these fun days!!!!


 And I have been madly creating with this paper pack too...look at these FUN cards I made as well.....


I had fun with our Sparkles and Opaques that helped jazz these cards up and give them a little pop!


~Jennifer  :-)

Friday, August 26, 2011

Fun Friday Crafty Project!

Make your own Coasters!  FUN and easy to Do!

Run on down to your local home improvement store and grab some 4x4 tiles- choose whatever style you like.

Then come home clean them- just wash them off and let them dry.

Next thing I did was pick out a fun Alphabet Font to use for the tile.  I love our E size alphabets.  I used the Baroque Alphabet.  And the E size alphabets are now a NEW lower price at just $29.95!  All of our Stamp Sets have NEW lower prices and I just love that!


I then loaded the letter I wanted (for us B for Bohnart :-) ) and dipped it in the Stazon Black Ink.  Then take your time and line it up where you want it on the tile(love our clear blocks for this project).  Be sure to press down firmly and not wiggle your block.  Let it dry and you are good to go.  I also added those small felt pads for the bottom or you could use the small plastic bumpers- whatever you think would work best it is up to you.


This makes a great house warming gift or any gift for a family.  Personalized Coasters are great!   Let me know if you like this and if you decide to make them!

Enjoy and HAPPY Crafty Friday!

~Jennifer  :-)

Thursday, August 25, 2011

Time for....Me...????

Okay that is an interesting concept, right!?!  For any mom out there you know what I mean.  We are so use to doing and getting things done and tableing those items that we would like to do for ourselves.  My kiddos started school on Tuesday this week and I found myself all day walking around this new house thinking of them constantly and not knowing what to do with myself while they are gone!

New places, new schedules, new friends(hoping I will find some soon) and just everything NEW!  It can lead you down a crazy path- one that can drive you a little batty as you are not knowing where to start, what to finish, or what is a true priority.  Yes this is our 6th move in our 13 years of marriage and yes one would think you would get use to it and know how to "roll" with everything but let me tell you it is new everytime unless you are going back to a place you have been before- in our case that has never happened. So the first day of school, I was all consummed about my kids if they were doing okay, meeting friends, feeling settled- all the typical concerns.  And then yesterday I came home after dropping them off and started with the pacing around the house and trying to figure out what to do with all my time....then it hit me like a ton of bricks....something a friend mentioned to me during our move/transition and it made sense when she said it but to be honest I just sorta pushed it aside.  But yesterday it hit me square in my face- TAKE THIS QUIET TIME AND DO WHAT YOU WANT!
really?!?  So I sat and thought about what have I not had time to work on that if I had all the time to devote to what would it be.....CATCHING UP ON MY SCRAPBOOKS!!!!

Okay some of you may be thinking- what?!?  Seriously I work on a lot of different projects and teach classes to others be it preschool last year or my monthly Scrap N Play club but that does not mean I am working on the things that I want and that are meaningful to me!  So I dived in and tried to figure out where I was in my books but that path just leads to me overplanning so I opened up one of my photo boxes and just started cranking them out.  Confession here----because I have taught so many classes and designed different projects I have a lot of Scrapbook Pages ready for Photos so that cuts a lot of my time in half!  So I sorted through my stack of created layouts and would match the colors/themes with my photos I had to scrap.  Then I needed to add the embellishments, journaling and other fun touches.  So here is just one example of what I mean:
All the pictures added but it needs more...don't you think?  Like what is this about...what is the focus of the story I am trying to tell???(you can click on the photos too to see them larger if you like)


And then I LOVE our Memory Protectors Photo Storage Pages they help a lot when you want to keep the story contained within a few pages.
and I love adding a fun journaling spot in one of the photo pockets too and you can jazz it up with a few stamps to coordinate with your scrapbook layout.

So I am off to continue to put photos to pages and work on things that are meaningful to me.  I think as Life comes together here I need to keep this in focus and remember to take time to work on my scrapbooks and not let the overwhelming feeling creep in.


Oh my new Cricut Expressions was delieverd last night too....thinking I need to drag that out of the box and figure that bad boy out!  So much to do- I guess I do have things to keep me busy!  :P


Creatively Yours,
Jennifer